How to Winterize an RV for Storage: The Complete Guide
By FindBoatStorage Research Team · Published February 2026 · Updated February 2026 · Based on verified data from our directory
Winterizing your RV before storage is essential to prevent freeze damage, mold, pest infestations, and mechanical problems that can cost thousands to repair. Whether you own a Class A motorhome, a travel trailer, or a fifth wheel, proper winterization protects your investment and ensures you are ready to roll when spring arrives.
This complete guide walks through every step of the process — from draining the plumbing to protecting the exterior — based on recommendations from RV mechanics, storage facility managers, and long-time owners across the US. If you follow these steps before dropping your RV at a storage facility or parking it in your driveway, you will be far less likely to face expensive surprises when you take it out again.
When Should You Winterize Your RV?
Winterize your RV before the first freeze in your area. For most of the US, this means September through November depending on your state. In northern states like Minnesota, Wisconsin, and Montana, nighttime freezes can arrive in late September. In moderate climates like the Carolinas or Texas, you may have until November or even December.
Do not wait for a hard freeze — a single night below 32°F can burst water lines, crack the water heater tank, and split fittings. The damage often does not show up until you pressurize the system in spring, when you discover multiple leaks that require extensive repairs.
Even if you plan to store your RV in a climate-controlled indoor facility, it is still good practice to winterize the plumbing system. Water lines can freeze during transport to and from the facility, particularly during early morning or late evening trips when temperatures drop.
Step 1: Drain the Entire Water System
This is the most critical step in the winterization process. Water expands roughly 9% when it freezes — enough pressure to split plastic fittings, crack PEX tubing, and rupture the fiberglass tank on your water heater.
- Drain the freshwater tank completely by opening the drain valve or petcock at the bottom of the tank
- Allow the water heater to cool completely, then open the pressure relief valve and remove the drain plug — never drain a hot or pressurized water heater
- Open all interior faucets (hot and cold) and outdoor shower valves and allow them to drain fully
- Flush the toilet several times until the bowl and lines are empty
- Drain the gray and black holding tanks at an approved dump station
- Open all low-point drain valves — most RVs have two (one for hot lines, one for cold lines), usually located underneath the rig near the chassis
- Remove and drain the water filter if your RV has an inline filter system
After draining, leave the low-point valves open until you are ready to move on to the line-clearing step. Gravity will continue pulling residual water out of the lines while you work on other tasks.
Step 2: Clear the Lines — Blow-Out vs. Antifreeze Method
Even after thorough draining, water remains trapped in plumbing lines, the toilet flush valve, and low spots in the system. You have two proven methods for clearing this residual water.
Option A: Air Blow-Out Method
Connect a standard air compressor to the city water inlet using a blow-out adapter (available at most RV supply stores for under $10). Set the compressor to 30 PSI maximum — higher pressure can damage fittings and valves.
With the compressor connected, open each faucet one at a time — kitchen cold, kitchen hot, bathroom cold, bathroom hot, outdoor shower — holding each open for 10–15 seconds until no more water exits. Flush the toilet twice. Finish by opening all low-point drains while the compressor is running to clear any remaining pockets.
Advantages of the blow-out method: no chemicals introduced to the system, no residual antifreeze taste in spring, and faster to complete on rigs you know well. Disadvantage: requires more technique to ensure all water is cleared, especially in complex plumbing systems with multiple slides and basement storage areas.
Option B: RV Antifreeze Method
Use a water pump converter kit (or bypass the water heater using its bypass valve) and pump non-toxic RV antifreeze — the pink, propylene glycol formula — through every faucet, toilet, shower, and drain until you see pink fluid emerging. This indicates the lines are protected.
Typical antifreeze quantities: 2–3 gallons for a small travel trailer, 4–6 gallons for a larger fifth wheel or Class A. Also pour a small amount directly down each drain to protect the P-traps from freezing.
Critical warning: Use only non-toxic RV/marine antifreeze (propylene glycol). Never use automotive antifreeze (ethylene glycol) — it is highly toxic and will permanently contaminate your water system, requiring full replacement of all lines and tanks.
Advantages of the antifreeze method: more reliable for complex plumbing systems, better for very cold climates (rated to -50°F), and preferred by most professional RV winterization technicians. Disadvantage: you need to flush the system thoroughly in spring before drinking the water.
Step 3: Engine and Generator Preparation (Motorhomes)
If you own a Class A, Class B, or Class C motorhome, the engine and generator require their own winterization steps. Skipping these can lead to corrosion, stale fuel, and a generator that will not start in spring.
- Engine oil change: Change the engine oil and filter before storage. Used oil contains combustion acids that attack bearing surfaces during long periods of inactivity. Fresh oil provides better protection during the storage period.
- Fuel stabilizer: Fill the fuel tank to 90–95% capacity (prevents condensation in the tank) and add a quality fuel stabilizer such as STA-BIL or Sea Foam per the product instructions. Run the engine for 15–20 minutes to circulate the treated fuel through the entire fuel system including the injectors or carburetor.
- Coolant check: Verify that your coolant mixture is rated to at least 10–15°F below your expected storage temperature. Most RV coolant systems are pre-mixed, but older rigs may need a top-off or flush.
- Generator: Run the generator under at least a 50% load (with the air conditioner on) for two hours using the stabilized fuel. Then shut off the fuel supply valve and allow the generator to run until it stops on its own, clearing the carburetor of stale fuel. Change the generator oil if it is within 25 hours of the service interval.
- Diesel exhaust system: If you have a diesel pusher, check the DEF (diesel exhaust fluid) system — DEF freezes at 11°F and can damage the tank and lines if not managed properly.
Step 4: Battery Maintenance
RV batteries — both the coach house batteries and the chassis starting battery — are vulnerable to cold weather and to the slow discharge that happens during storage. A fully discharged battery will freeze solid at 20°F, causing internal plate damage that is irreversible. A fully charged battery will not freeze until approximately -75°F.
- Fully charge all batteries using shore power or a battery charger before your final storage preparation
- Clean the terminals thoroughly with a baking soda and water solution, then a wire brush, to remove any corrosion
- Disconnect the negative terminals or turn off the main battery disconnect switch to stop parasitic draws from clocks, LP detectors, and other always-on circuits
- If storing in a location where temperatures will drop below 20°F, remove the batteries entirely and store them in a temperature-regulated space such as a garage
- Connect a smart battery maintainer or trickle charger if shore power is available at your storage facility — this will keep batteries at full charge throughout the winter without overcharging
- Check battery water levels on flooded lead-acid batteries before storing and top off with distilled water if needed
Step 5: Propane System Preparation
The propane system requires a few simple but important steps before long-term storage.
- Turn off all propane appliances at the unit level first (furnace thermostat, water heater switch, stove burner knobs)
- Close the main propane shutoff valve at the tank or the POL valve on the tank itself
- Check propane connections and hoses for cracks or deterioration — winter is a good time to address any marginal hose connections before spring use
- Do not store propane tanks in enclosed spaces — they must always have ventilation
- Note that many storage facilities require propane tanks to be fully closed or, in some cases, removed entirely — confirm the rules at your facility before moving in
Step 6: Interior Cleaning and Pest Prevention
A sealed, unventilated RV with food residue, fabric odors, and small entry points is an ideal winter habitat for mice, squirrels, and insects. A single mouse can cause thousands of dollars in damage by chewing wires, nesting in insulation, and contaminating surfaces with urine and feces.
- Remove all food without exception — canned goods can freeze and rupture, and any trace of food smell will attract rodents. Check cabinets, drawers, pantries, under-bed storage, and basement compartments
- Deep clean every surface: countertops, stove top and inside the oven, microwave, bathroom, and flooring
- Defrost the refrigerator completely, wipe it dry, and leave the door propped open with a small rolled towel — a closed refrigerator in storage grows mold within weeks
- Open all interior cabinet and closet doors slightly to allow air circulation and prevent moisture buildup
- Place moisture absorbers (DampRid, Dri-Z-Air, or rechargeable dehumidifier units) throughout the RV — at minimum: two in the main living area, one in the bathroom, one in each bedroom or closet
- Remove bedding, pillows, and soft goods if storing in uncontrolled or outdoor conditions — these absorb moisture and develop mildew odors
- Seal every entry point: stuff steel wool into gaps around plumbing penetrations, furnace vents, AC drain holes, and cable entry points — rodents cannot chew through steel wool
- Place Fresh Cab botanical rodent repellent pouches or peppermint oil sachets throughout the rig — replace every 30 days
- Set a few snap traps in cabinet corners as a backup — avoid poison bait, as rodents that die inside walls create odor problems that persist for months
Step 7: Roof Inspection and Exterior Protection
The exterior of your RV takes the full brunt of winter weather. Water that gets past deteriorated seals causes wood rot in the roof decking and sidewalls — one of the most expensive RV repairs there is.
- Roof inspection: Carefully walk the roof (check the weight rating first) and inspect every seam, around all roof fixtures (vents, AC unit, antennas, solar panels), and at the front and rear caps. Apply Dicor self-leveling lap sealant to any cracks, gaps, or areas where sealant has pulled away from the surface
- Sidewall seals: Check all window frames, door frames, and sidewall seams for cracked or missing caulk. Apply self-adhesive RV sealant tape or caulk as needed
- Wash and wax: Wash the entire exterior with RV-safe soap and apply a UV-protective wax or sealant — this protects the gelcoat or fiberglass finish from UV degradation even when not in direct sun
- Slides: Fully retract all slide-outs before storage. Inspect the slide seals and apply rubber conditioner to prevent cracking during cold weather
- Awnings: Roll in and secure all awnings. Clean and dry them before rolling to prevent mildew
- Tires: Inflate to the manufacturer's maximum recommended pressure (tires lose approximately 1–2 PSI per month in cold weather). Install UV-resistant tire covers on all tires, including the spare. If storing for more than 4 months, consider moving the RV a few inches periodically to prevent flat spotting on a single contact point
- Leveling jacks: If you use stabilizing or leveling jacks, retract them fully. Apply a thin coat of white lithium grease to the jack screws and mechanisms to prevent corrosion
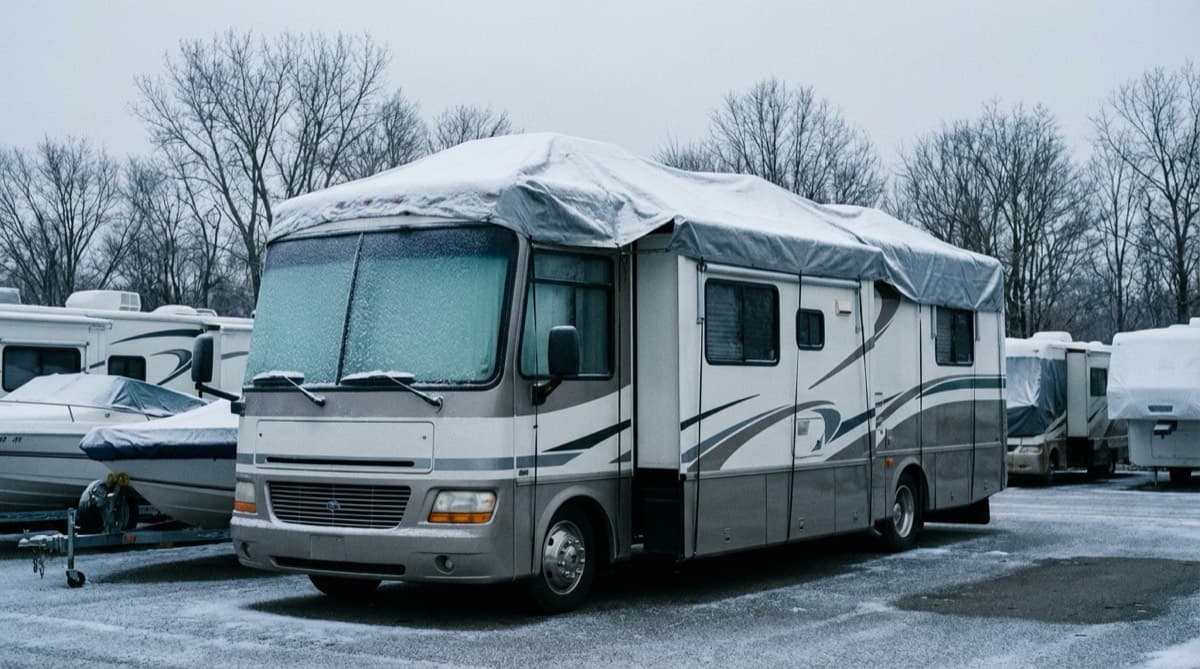
- Exterior cover: If storing outdoors, use a quality breathable RV cover that fits your rig. Avoid using generic tarps — they trap moisture against the surface, promoting mold and oxidation. A proper cover also protects from bird droppings, tree sap, and pollen
Step 8: Choosing the Right Storage Facility
Your storage choice directly affects how much winterization work you need to do and how well your RV survives. Indoor climate-controlled storage minimizes the impact of every threat — freeze, UV, moisture, and pests. Outdoor storage maximizes exposure and requires the most thorough preparation on your part.
| Storage Type | Protection Level | Typical Monthly Cost | Best For |
|---|---|---|---|
| Climate Controlled Indoor | Premium | $200–$600+/mo | High-value rigs, harsh winters |
| Enclosed Indoor | Excellent | $150–$500/mo | Full weather and UV protection |
| Covered Carport | Good | $75–$250/mo | Most RV types, moderate climates |
| Outdoor Open Lot | Basic | $50–$150/mo | Budget storage, mild climates |
Browse RV storage facilities near you to compare pricing, security features, and availability by state.
Step 9: Monthly Check-Ins During Storage
Even a well-winterized RV needs periodic attention during a long storage period. Plan to visit your rig at least once a month, or arrange with the storage facility to have someone check it periodically.
- Check for rodent evidence — droppings, nesting material, chewed cables — and reset any traps
- Replace moisture absorbers when they become saturated (DampRid crystals turn to liquid)
- Inspect the roof and exterior for any new cracks or seal failures after storms
- Check tire pressure and look for signs of sidewall cracking
- If on shore power, verify that the battery maintainer is still connected and functioning
- Run the generator for 30 minutes under load once a month if your facility allows it — this keeps seals lubricated and fuel circulating
Spring De-Winterization Checklist
De-winterization in spring takes 1–2 hours and gets your RV ready for the season. Here is a quick checklist:
- Flush the water system thoroughly — run all faucets for several minutes, flush the toilet multiple times, and run the water heater until the water runs clear and tasteless if you used antifreeze
- Reinstall and reconnect the batteries; recharge if needed
- Inspect all roof and wall seals for any winter damage
- Check tire pressure and condition before the first trip
- Reconnect propane and check all appliances for proper operation
- Run the generator under load for 30 minutes
- Test the smoke detector, CO detector, and LP gas alarm
- Check all slide-out seals and lubricate slide mechanisms
- Inspect under the chassis for any signs of rodent nesting or wire damage
A thorough winterization takes approximately 3–4 hours for a travel trailer and 5–7 hours for a large motorhome. It is a modest investment of time that prevents far more costly repairs — and makes the spring de-winterization fast and simple.